
In order to store a large amount of information, websites need to purchase servers for space to do so. The server access information is needed for the servers to work. Such information must be maintained secretive, or the server can be stolen or compromised. There are a number of ways to accomplish this, but here we’ll talk about using gem figaro to secure server access information.
First you need to make sure you’re already sign up for a server service somewhere, here we’ll use AWS (Amazon Web Services). Once you’ve signed up and verified your account, you can access the AWS console, where you’ll find “S3” under the “Storage & Content Delivery” category.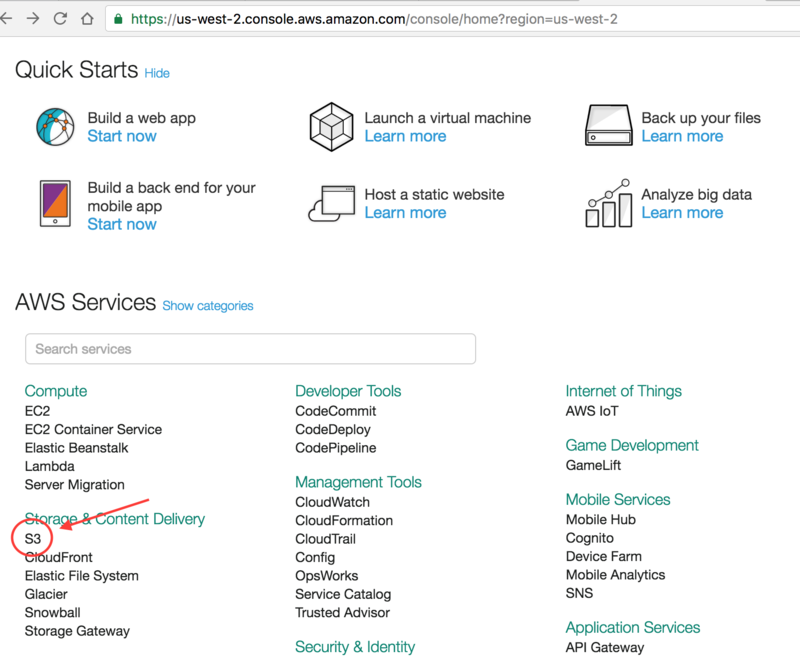
S3 is Amazon’s storage solution, typically used to store large binary files. Then, create a bucket. Name your bucket something relevant to your project and keep the name handy.

Then, go to your text editor and do the following:
-
Install
gem figaro, runbundle installand thenfigaro install -
Run the following to create a copy of your
application.ymlfile to be uploaded, but doesn’t contain your AWS access key info:1cp config/application.yml config/application.yml.example -
Go to AWS console, under your user name on the top right, go to “Security Credentials”, then click on “Access Key (Acces Key ID and Seceret Access Key). Click “Create New Access Key” and download the file. Save it somewhere secure.
-
Next go to
application.ymland place your AWS access information, as an example:config/application.yml 12345production:AWS_ACCESS_KEY_ID: XXXXXXXXXXXXXXXXXXXXAWS_SECRET_ACCESS_KEY: XXXXXXXXXXXXXXXXXXXXXXXXXXXXXXXXXXXXXXXXAWS_BUCKET_NAME: YOUR-BUCKET-NAME -
The above information is accessed by whatever gem in your app that is using the AWS storage. In my case, I’m using CarrierWave to upload images, but in order to connect to the AWS API I need another gem for integration called
gem fog. So addgem fogto theGemfileand runbundle install. And now in the imageuploader, disable thestorage :fileline.app/uploader/image_uploader.rb 12class < CarrierWave::Uploader::Base -
Under
config/initializers, create acarrierwave.rbfile to help CarrierWave initialize, and add the below code:config/initializers/carrierwave.rb 1234567891011121314CarrierWave.configure do |config|if Rails.env.production?config.storage :fogconfig.fog_credentials = {provider: 'AWS',aws_access_key_id: ENV["AWS_ACCESS_KEY_ID"],aws_secret_access_key: ENV["AWS_SECRET_ACCESS_KEY"],region: 'eu-west-1' #(location of your S3 bucket)}config.fog_directory = ENV["AWS_BUCKET_NAME"]elseconfig.storage :fileendend
ENV is short for “Environment Variables”, and you can see these match the names in the application.yml file.
-
Once these are set up, go to the
.gitignorefile and add inconfig/application.ymlto make sure the git will not be uploading this file containing AWS access info onto Heroku. If this is done successfully, you should seeconfig/application.ymleither in light grey color or hidden away. -
Assuming you’ve already uploaded the current app onto Heroku, run
figaro heroku:set -e productionin Terminal, you should see the AWS information you’ve listed inapplication.ymllisted. -
Run
heroku configin Terminal, you should now see Heroku is setup with AWS configuration. -
If all above ran smoothly, you can now commit & push to Heroku.


近期评论